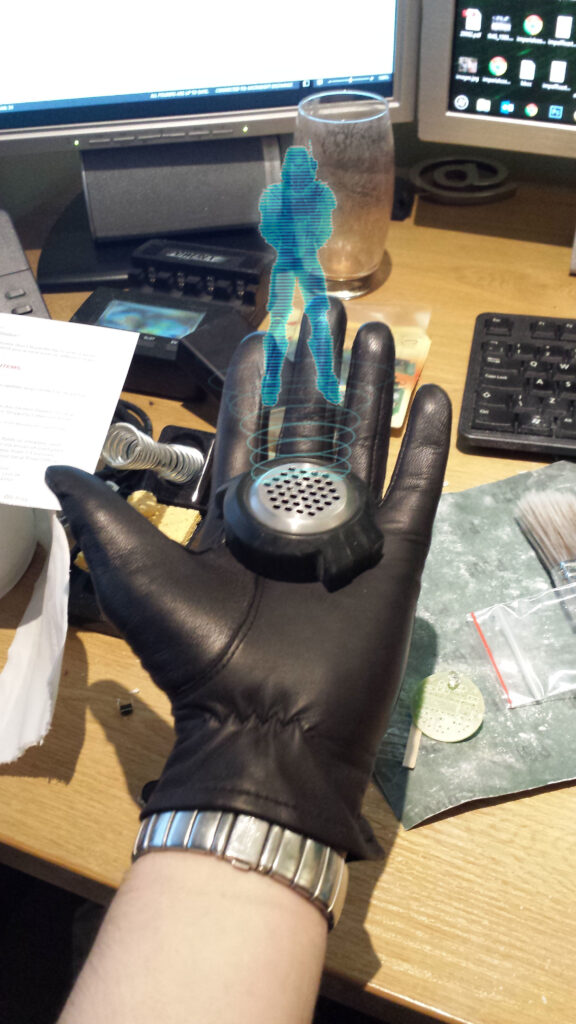
After Cosplaying a SWTOR Agent, I looked at more props I could create from the game.
Holograms for communication are a big part of the Star Wars universe, and the pocket Holocom used so often in the game appealed to me and seemed like an interesting project.
Proof of Concept
The proof-of-concept in the video below was put together with a black tinted resin body poured into a hand made modelling clay mould. It was then filed and sanded into shape by hand. The electronics are based around and Arduino Pro Mini 3.3v using very small 8bit 8Khz audio samples, squeezed into the programming memory. Due to the size of the components and the Arduino, there was little room for a battery, so I used a coin cell.
The Build
With the proof-of-concept proven, I set about designing a custom circuit. I wanted to keep the Arduino compatibility, but add power regulation, LiPo battery management and charging, an audio amplifier for better sound and additional flash storage for better quality audio files.
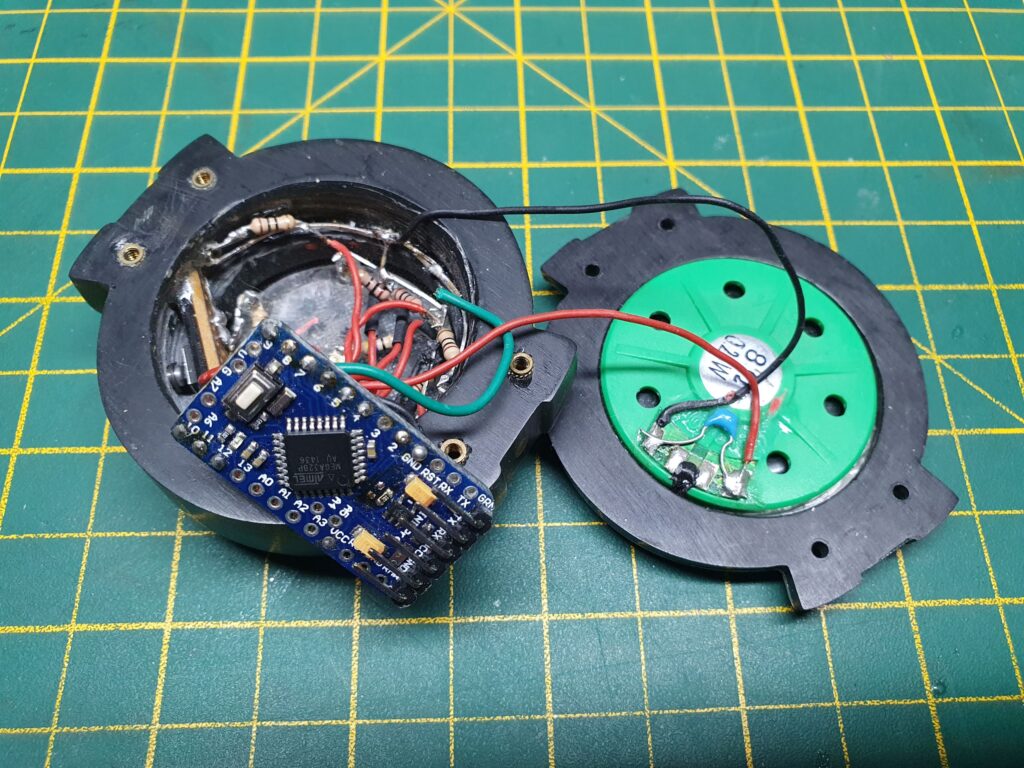
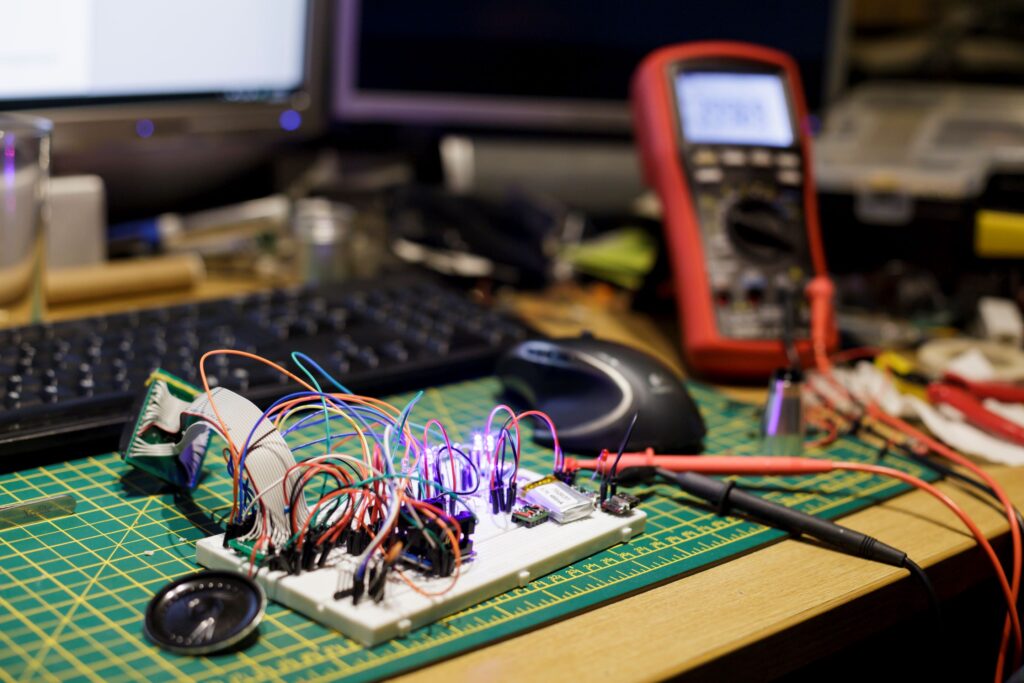
I designed the circuit around the same ATMEGA 328p microprocessor the Arduino uses, and added the additional components. This was a tough circuit to design on breadboard as it was just so complex. I did however get it to work, and designed a PCB and had it professionally etched.
After building the new prototype I realised I’d reversed the USB connector and had to hack it in, but with that slight modification made, the holocom was working as I’d hoped. If you look really hard, you can see the fudge on the prototype board in the video below.
Something I hadn’t accounted for prior to the build, was that I found the quiescent current drain (how much power it uses when it is doing nothing) of my circuit was very high and I was concerned that the Holocom would drain its battery when not is use. I had to set about incorporating an extra power saving circuit to give the microprocessor the ability to shut down the power supply to turn everything off when it’s not in use. This reduces the power used when not in use to almost nothing, but create the problem of how to get power back to the microprocessor when you need it to work again.
This stalled me for a long time, but eventually I came up with a circuit that meant the power would go off when the device wasn’t in use, and to power the device on again you just had to press and hold the “call” button for a second or two, booting up the the microprocessor and latching the power on.
Having “perfected” the circuit, I had to fit the new components onto the PCB design, and this de-railed me yet again. Six or more months went by before I revisited the Holocom, and with a fresh perspective made the changes I needed. I plucked up the courage and sent the design to the PCB fabricator to get 12 sets printed.
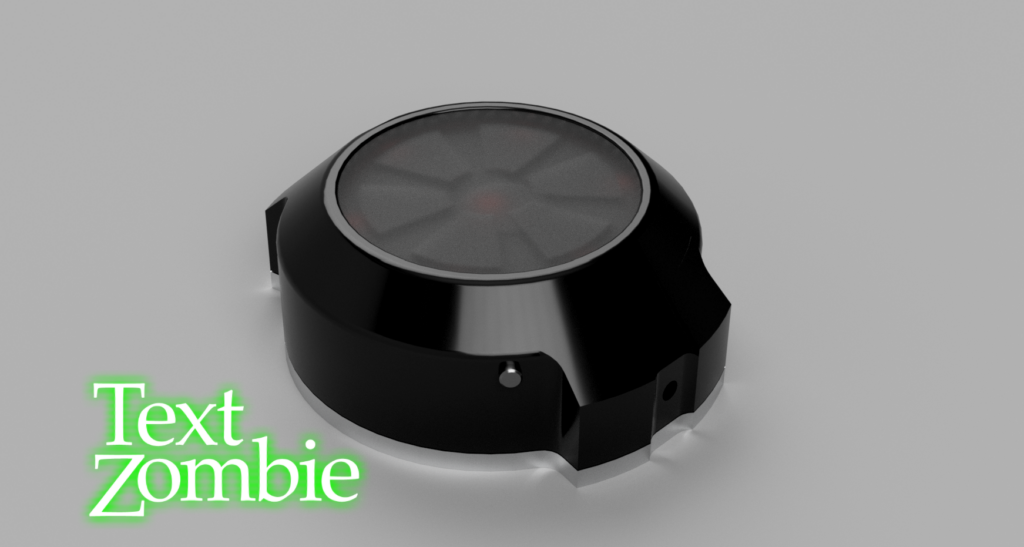
Below is a video of the latest version of the hardware and firmware in a 3d printed enclosure. I do now have a “hero” version which has been painted in much the same way as my CD-33s (though that has now been sold on) and I do have around 8 more boards mostly assembled but needing a final check and the associated hardware.
My efforts to create an aluminium body version have been a bit disheartening. I believe my CNC router isn’t quite up to the job. I do have one, but it lost steps along the way making it less than perfect. I also can’t recommend machining aluminium on your living room table.
I’ve recently scrapped that CNC machine and having moved into a house with a garage I can use as a workshop, have mostly built a new one and intend to have another go at an all aluminium Holocom.